
46% optin rate and from $6 cost-per-lead to just over $1 on FB Ads to cold traffic
Why these optin templates?
One of the differentiators between this template membership and others is that for the most part, the templates created and shared are actually being used in my business and have been proven to work well.
I see a lot of templates being thrown around and they look beautiful, but do they work?
Do they convert?
That's why this template you're reading is valuable.
Without context, the optin page I am about to share is really nothing special...
But the fact remains that I drastically improved my conversions for my paid advertising when I used these.
Disclaimer
The fact that these worked for me in my niche and my industry and the time I used these, does not mean the same will happen for you!
Please keep this in mind.
Your copy, your imagery, your niche, your targetting and audience who sees your page will be different to mine.
So the fact that I had specific conversion rates and cost-per-lead does not mean you will have the same.
Now that we got that out of the way, the templates...
$6 cost-per-lead (CPL) to just over $1 CPL
I'm gonna show you 2 optin pages...
Before and after.
And you need to guess which one did better.
One that gave me $6 per email address (aka cost-per-lead) in Facebook ads.
The other one gave me just over $1 CPL.
(I'll explain the importance of this in a moment).
First, the two versions:
Which one do you think did better?
Version 1 or version 2?
The answer is...
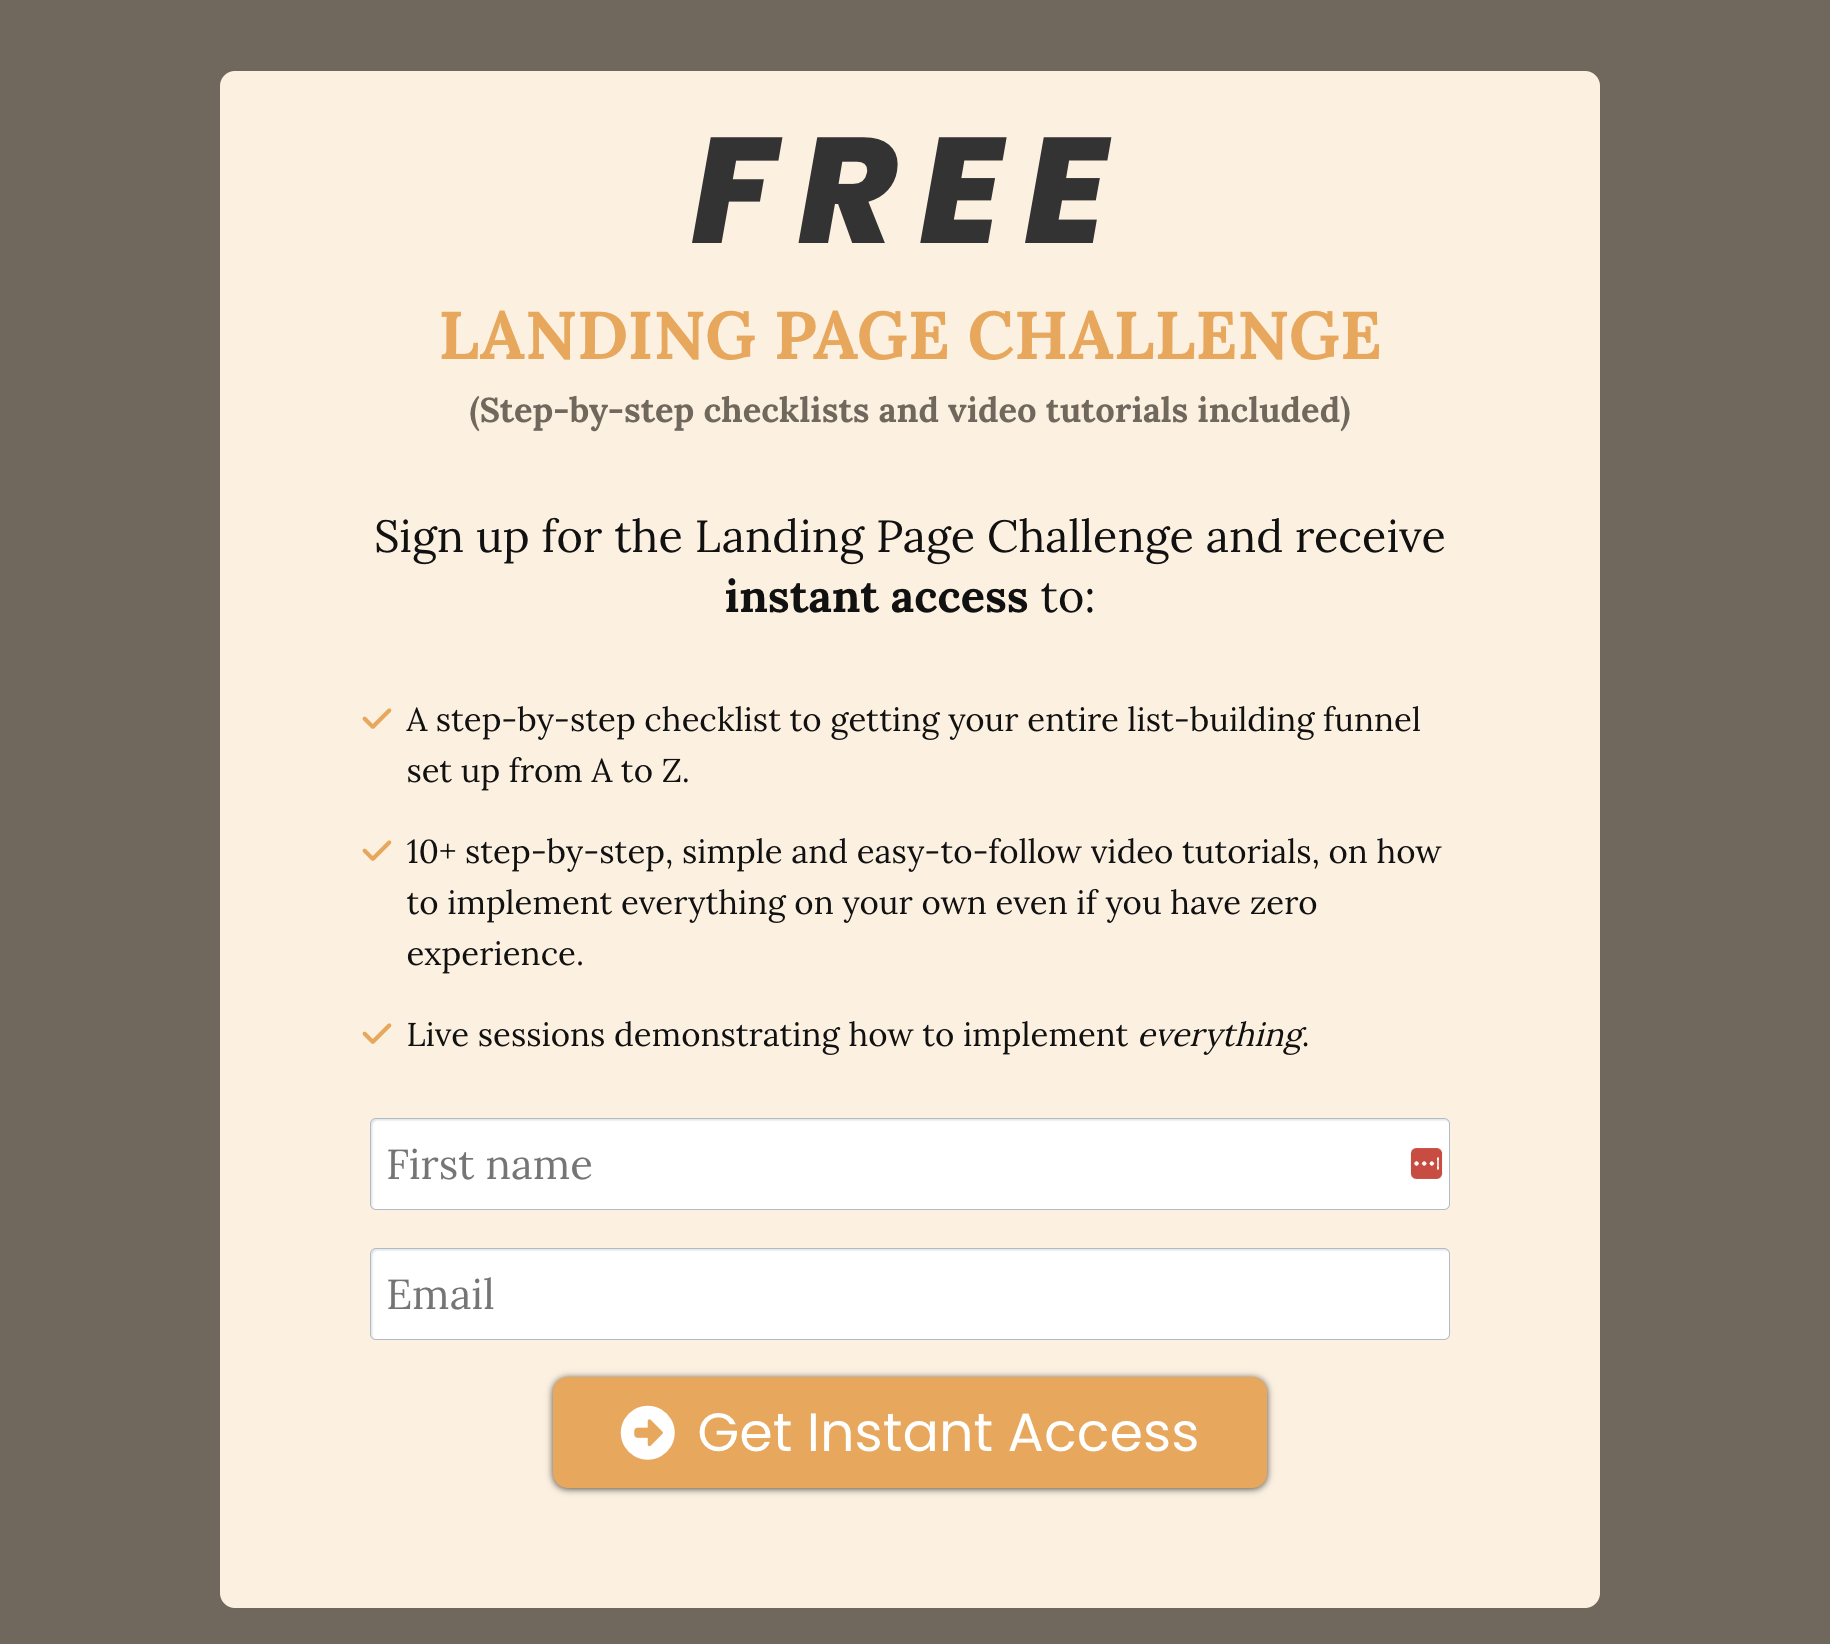
Version 2 resulted in $6 per email address on Facebook ads
Version 1 reduced it by 4x!
That means that if I spent $60 on advertising, with version 2, I get 10 email addresses (new leads).
With version 1, for the same $60, I would get over 40 new email addresses (new leads)!
That's a huge difference!
🎉 VERSION 1 WAS THE CLEAR WINNER! 🎉
Now, in full transparency, I am still working on improving the conversion rate of that landing page so it performs even better and it is in the process of getting A/B testing so I won't share that exact template.
But I will share the template that this version 1 was based on which resulted in 46% conversion rate.
That's the one I want you to model.
46% conversion rate
My optin page (or landing page, different word, means the same thing) for the www.WebsiteDIYcourse.com is the landing page I used to run paid advertising with Facebook.
Why did this page do so well?
Honestly, I don't know.
At first glance, this page is nothing special.
Yet it converted really well.
And based on THAT landing page that did well, the entire Landing Page in a Day course framework was created.
I didn't just make up that course out of thin air.
I had proven results on that framework for that landing page from Facebook ads and I used that proven framework to create the landing page challenge and landing page in a day course.
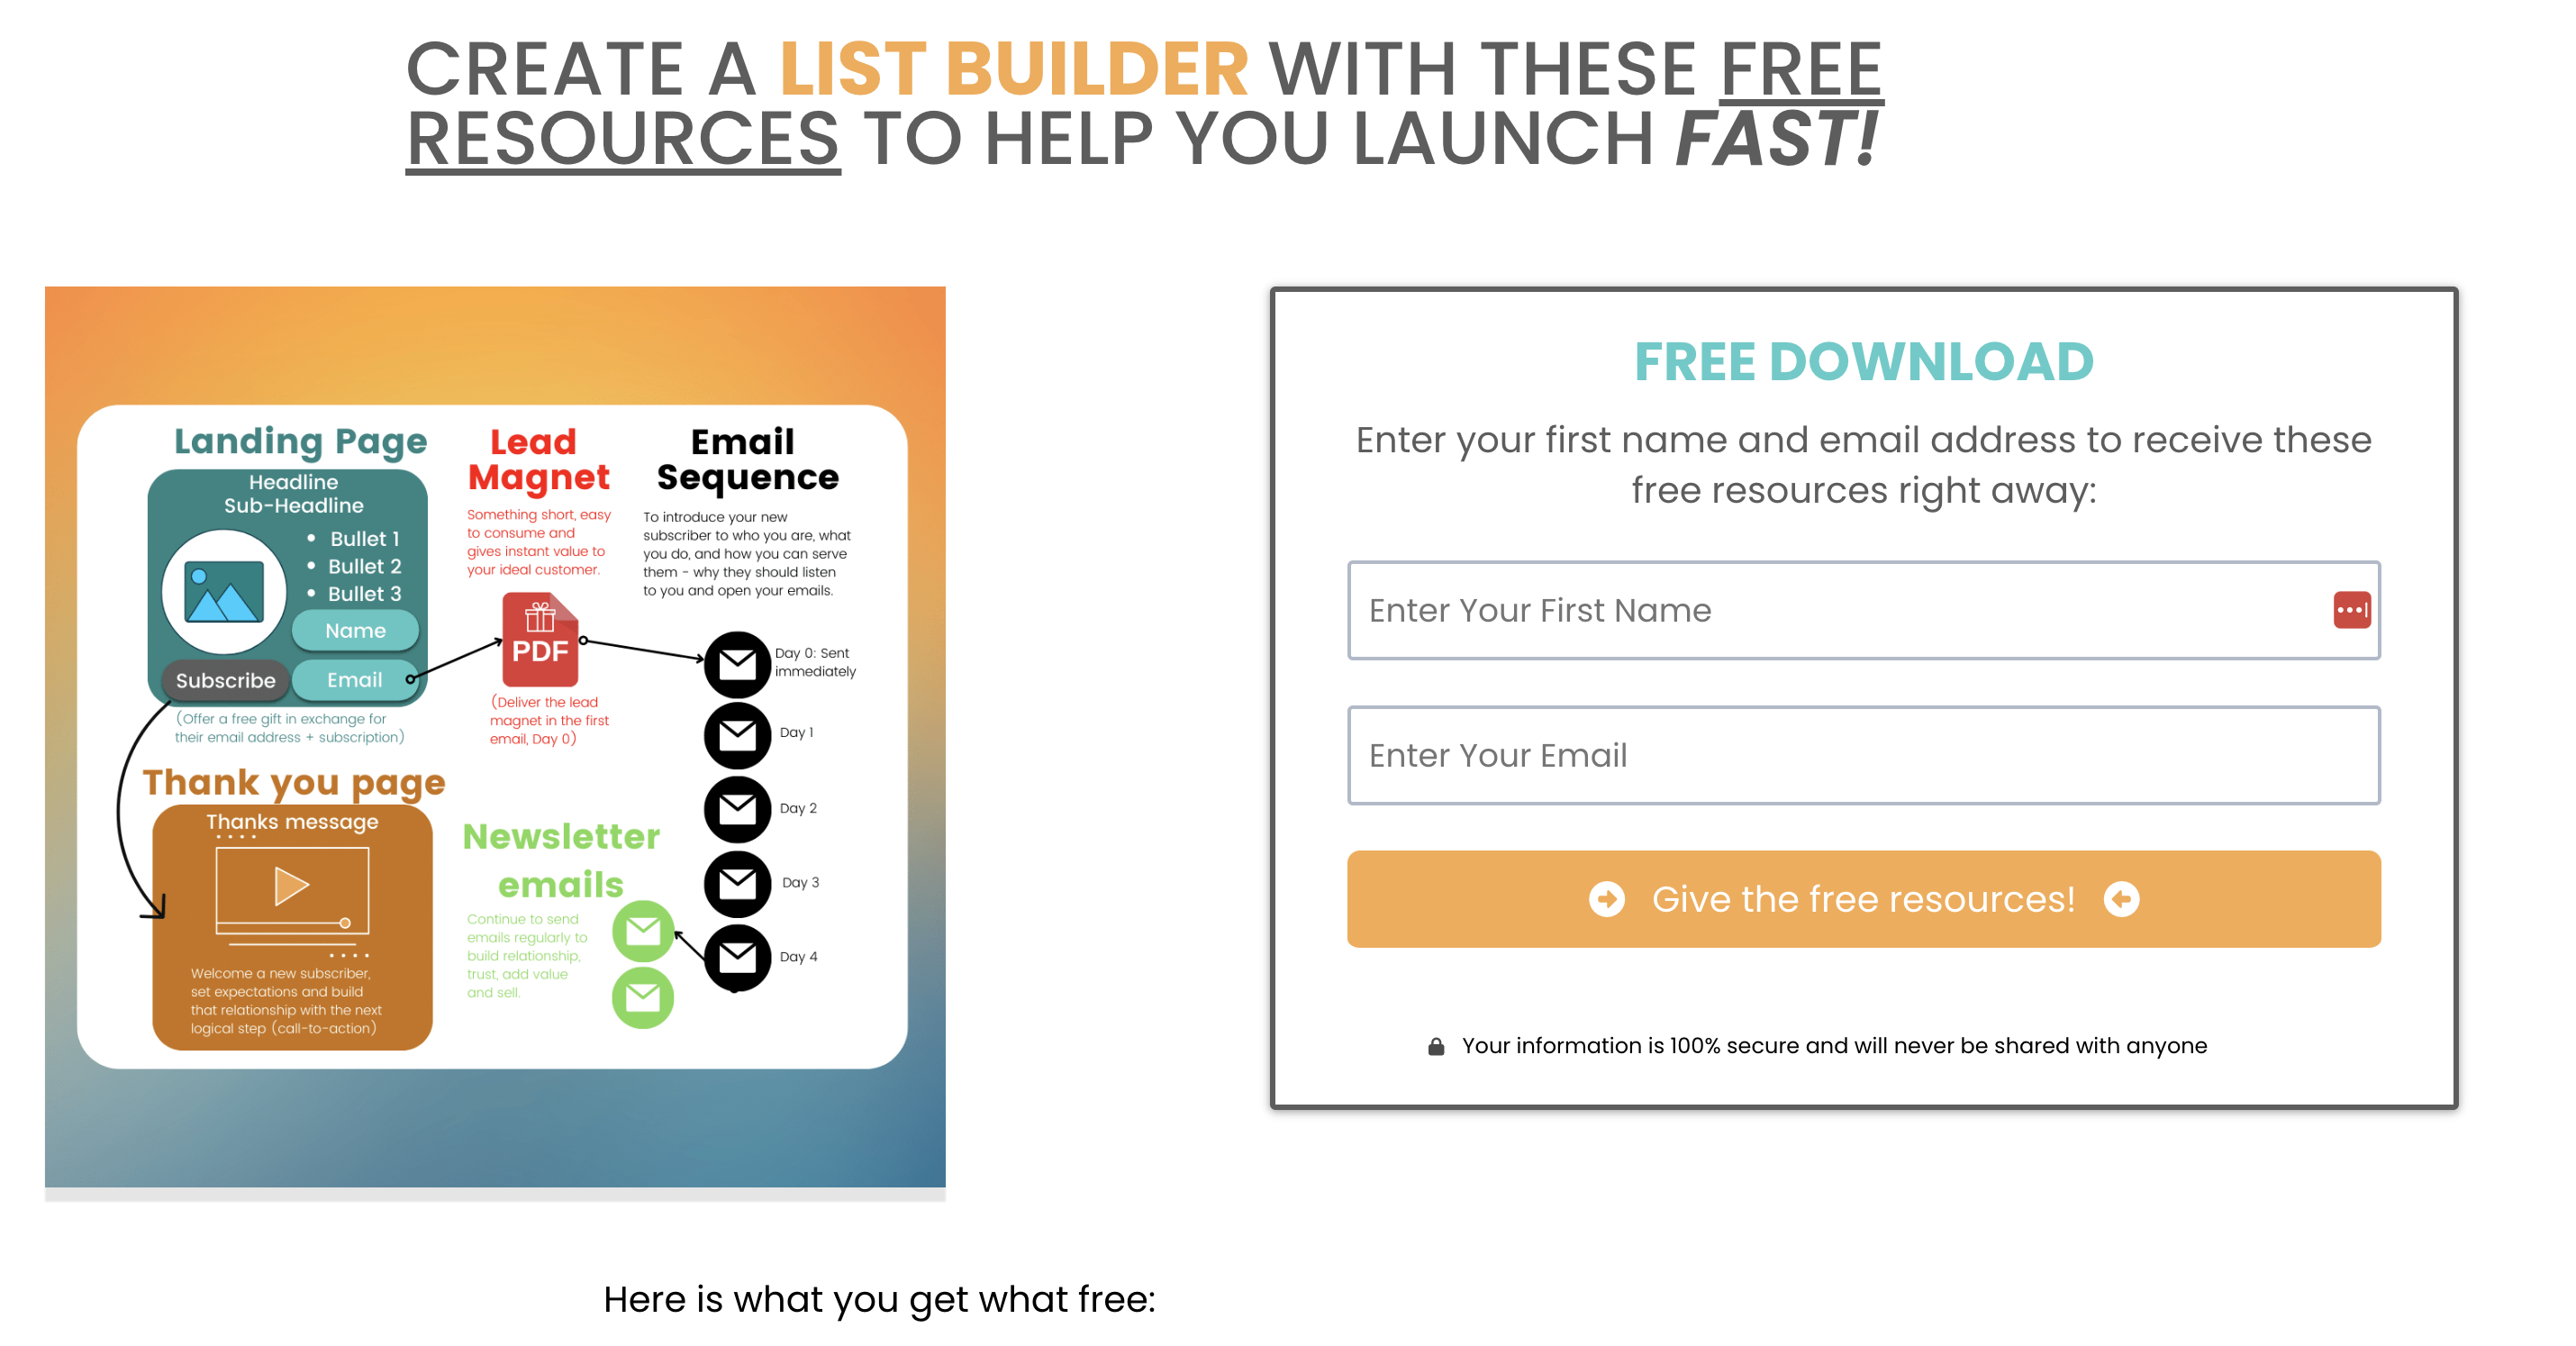
Here is what that landing page looks like:
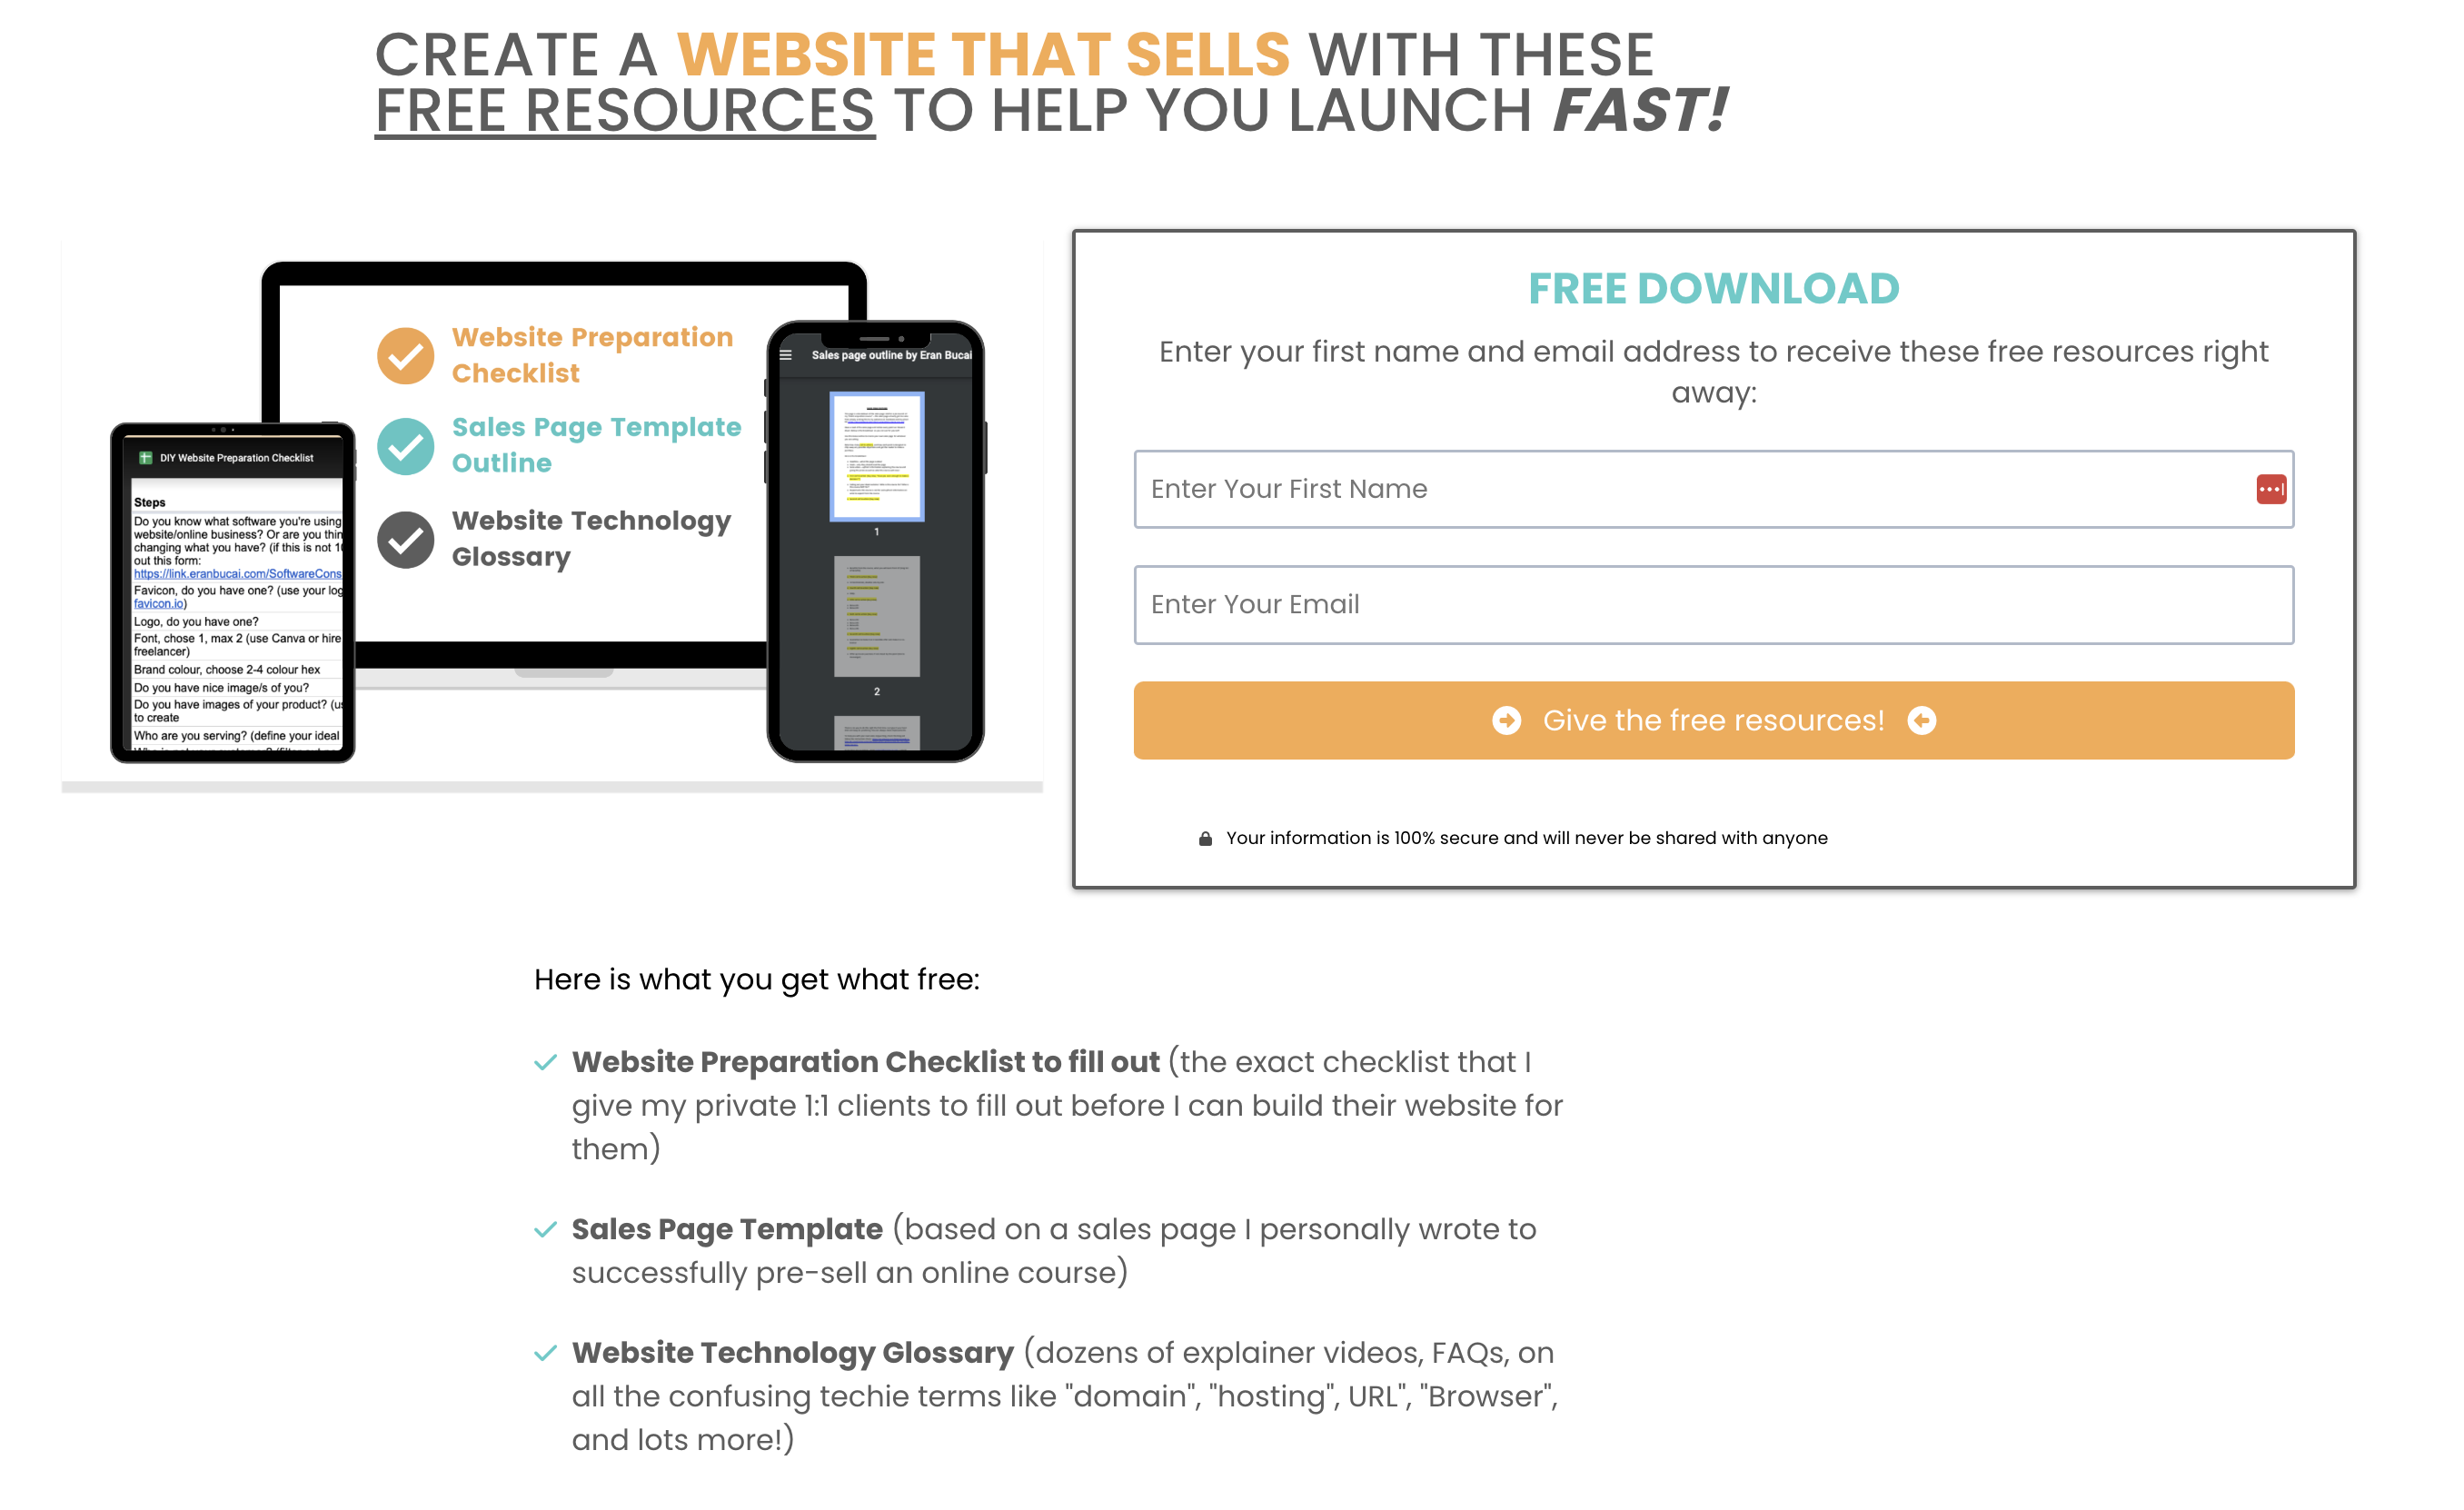
I am sharing this landing page template in 3 sections:
Section 1: Headline
Section 2: Product mock-up and optin form
Section 3: Feature/benefits Bullets
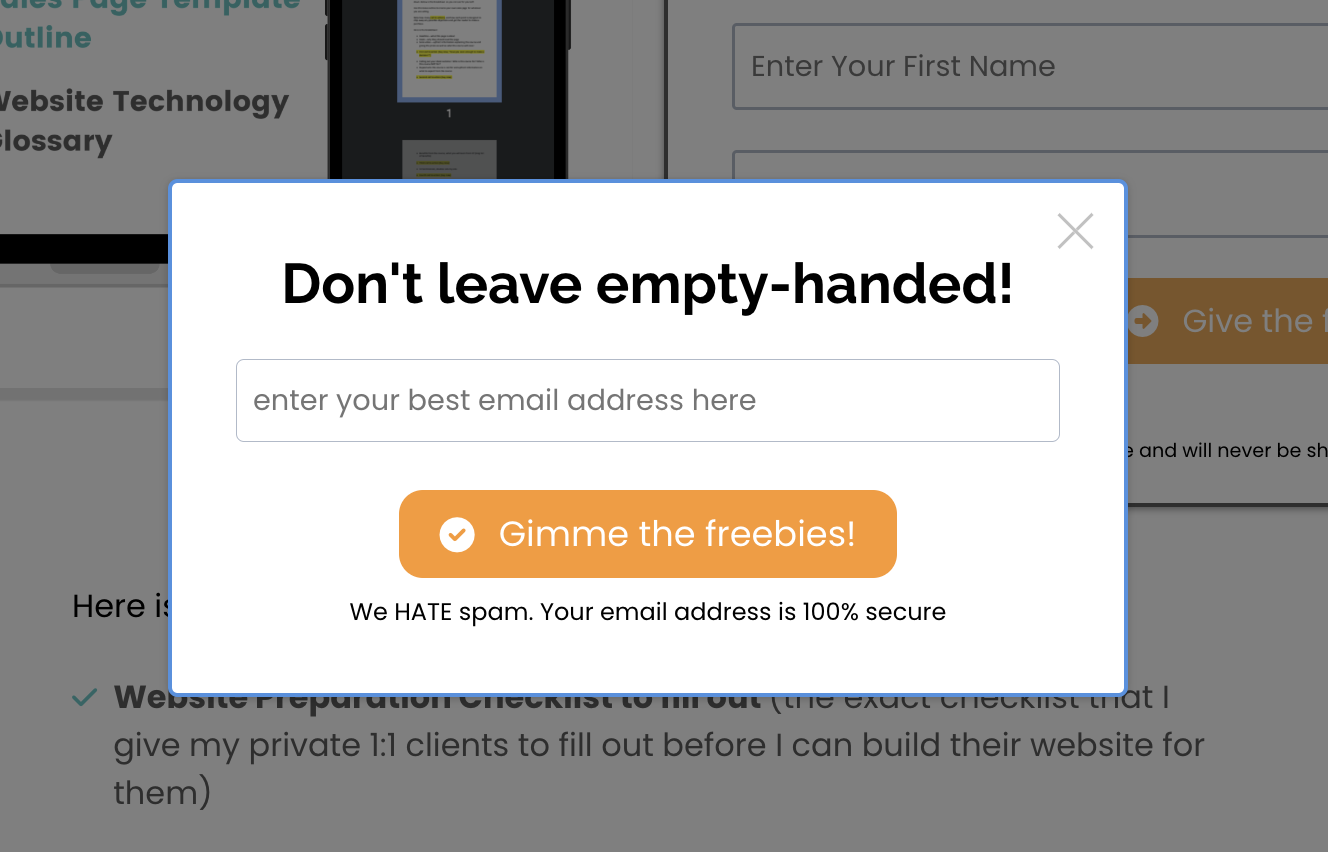
Exit popup
This landing page did not convert this well without an exit popup, so here is what it looked like:
Lastly, the product mock-up template I created isn't just any product mock up template.
I recorded myself explaining the creation of the product mock up from the SAME 46% conversion rate.
You'll see a tutorial and a Canva template below.
Digital Product Mockup in Canva, how to create one
Summary of my video:
Open up a presentation template from Canva to a blank white presentation.
Click on "elements" on the menu on the left and search for "frame".
Browse through the frames and drag the ones you want, laptop, phone, desktop, iPad, Book, etc. Any of these frames will allow you to add an image inside them.
Create the individual image you want to add into each of the frames.
You can create these images from inside Canva but creating a new canva project that is eBook cover, or square or any others. The sizing will make a different and this will require a bit of back and forth to test how it fits and looks once you enter the image to the frame.
You can also create these images by taking screenshots of what you want to put inside the frames. For example, taking a screenshot of your private members area, or course area, etc.
Once you have the images, upload them to Canva so it is added to the inside of the frames.
Once you have all the images in the frames, you can move the frames to make it look the way you want it.
Sometimes, you might want to have a different sizing image as the presentation might be too high or too wide. If that's the case, resize the Canva image (if on the pro plan), or highlight what you created and add it to a different project on Canva.
Once done, export it as PNG and make sure it's transparent.
You now have a digital product mock-up - congrats!
Upload the product mock-up to your web page.
Want help to get this task done with my virtual assistant together on Zoom? This is available in my tech support membership.

Hey, I'm Eran
I'm the CEO & Founder of Eran Templates (duh), since these are my templates 😉
I've worked for years to create digital assets in my business from email content, Canva slides and posts, website pages, and more.
Now is the time that I share all these creations with as many people as possible to give them a shortcut to getting things done with less time and less effort (without a hefty price tag).
This page was created for paid members only at this stage.
Please do not share it.
You are always welcome to join the affiliate program and help spread the word.
Visit: eran.link/jv